Senua’s Saga: Hellblade 2 – All Lorestangir Collectible Location
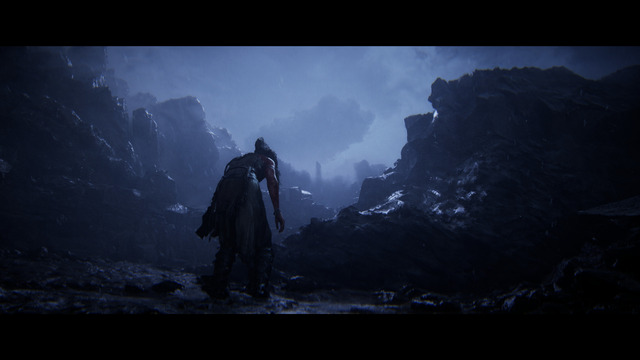 Senua’s Saga: Hellblade 2 is a second installment and a sequel to the game Hellblade: Senua’s Sacrifice. The story-rich game showcases the gore and gruesome journey of Senua through all the horrors and tyranny of the myths related to Viking Iceland. Amidst all the voices and madness, you have intense graphics and sound levels to create a chaotic and thrilling environment.
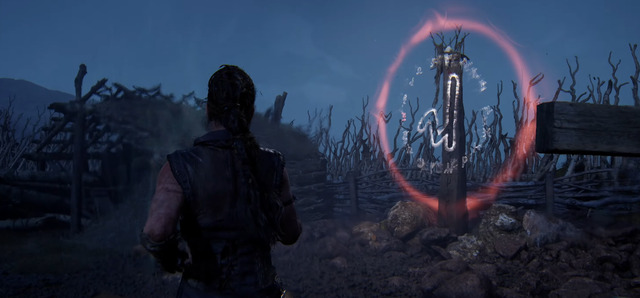
Lorestangir is the storytelling pillars or totem that give you the mythological backstory or the “Tales of the Midgard“. “Druth” which we are familiar with from the prequel Hellblade: Senua’s Sacrifice still can be heard through the Lorestangir. Collect all the Lorestangir to obtain or unlock an Achievement/Trophy i.e. Tales of the Midgard.
All Lorestangir Collectible Location In Senua’s Saga: Hellblade 2
There are a total of 18 Lorestangir in Senua’s Saga: Hellblade 2 scattered throughout the chapters. All the Lorestangir are listed below with the location to where you can find them if you have missed it. It can be collected on the next playthrough.
#1
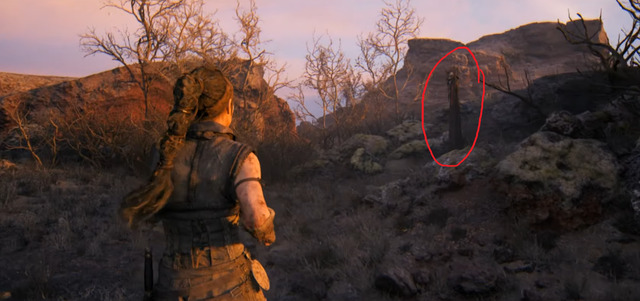
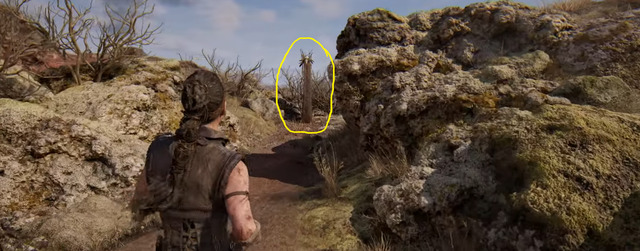
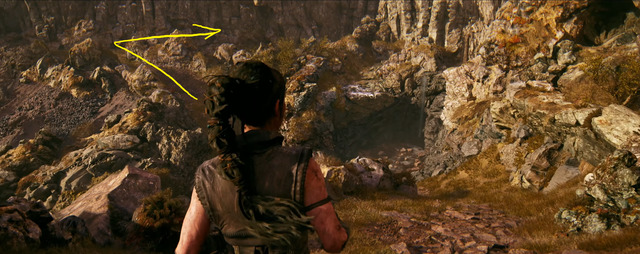
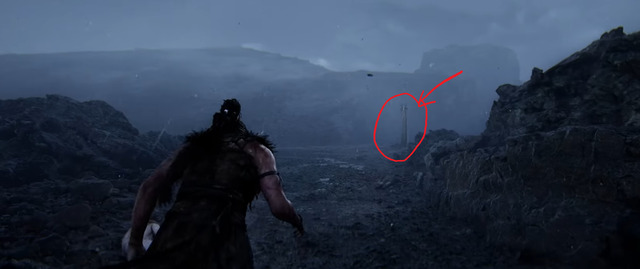 The first Lorestangir cannot be missed as it will be on your path in the 1st Chapter: Landfall itself. When you cross the first ruin settlement or flagged settlement, you will be able to notice the totem on the right side as shown in the image above.
#2
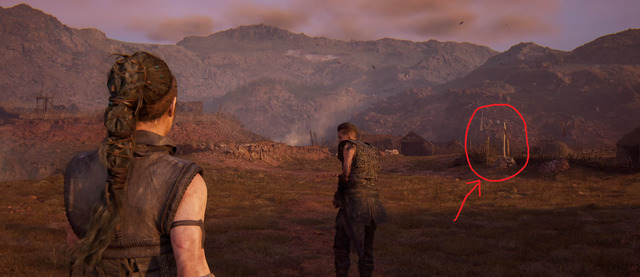
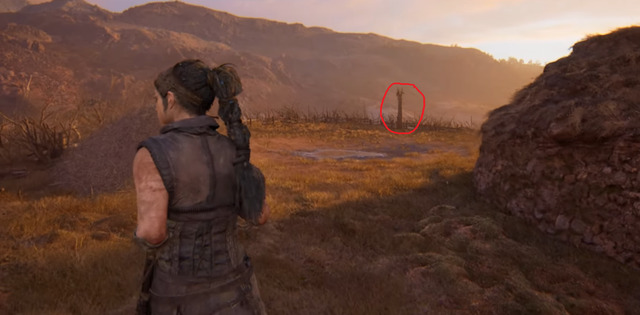 The second Lorestangir can be missed as you are required to sidetrack a little from the original route in 2nd Chapter: Freyslaug Sighted. As shown in the first image, when the Slaver, is taking you to the settlement; you will notice a small house or an abandoned property where you have to enter. At the field, as shown in the second image, you will find the 2nd Lorestangir.
#3
 The third Lorestangir can be found after you have obtained the mirror and crossed the bridge in Chapter 2: Return Home. As soon as you enter the house that has a ladder init, exit the house through the door and stick to the left of the same house. On the West side of the house, you will find the third Lorestangir.
#4
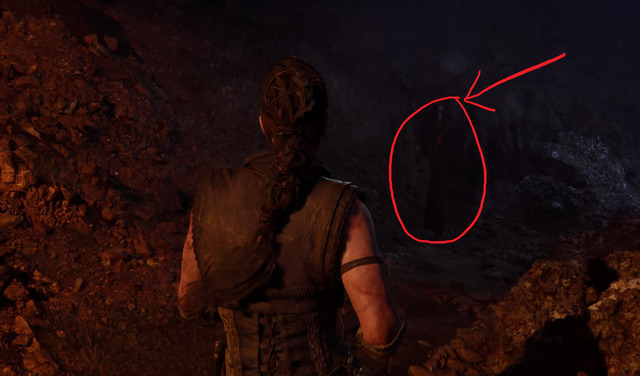 After crossing the cliff in Chapter 2: Draugar Ceremony, you will have to jump down from the higher platform. Next, you will reach a certain area where you will have two paths as shown above. Opting to climb the ladder will let you discover the 4th Lorestangir.
#5
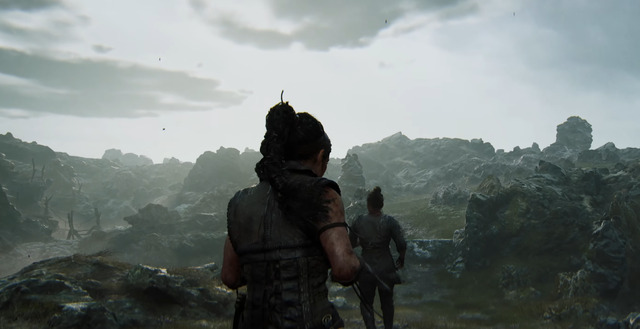
 In Chapter 2: Meeting The Stranger, you will be accompanied by Fargrimr. Follow him until you reach the broken bridge. On the side of the bridge, you will notice a drawing on the stone. If you walk left, you will find the Stone Face. However, if you follow Fargrimr, you will reach a crossroad as shown in the first image. Take the road to the left and you will find the 5th Lorestangir.
#6
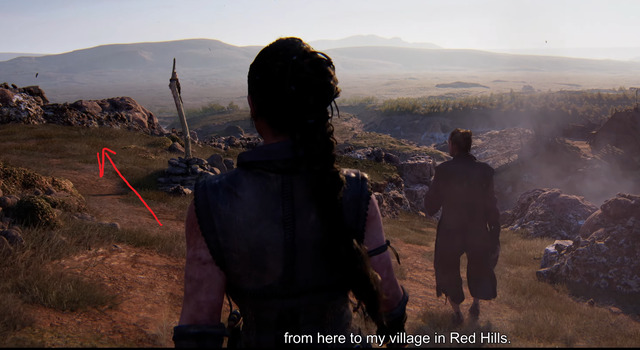
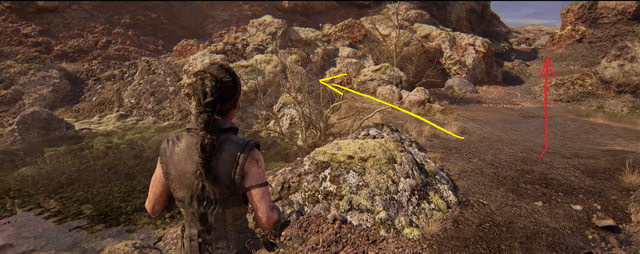
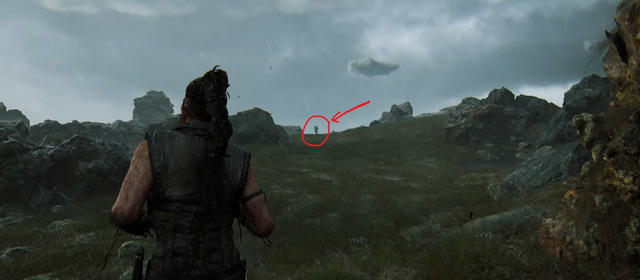
 In Chapter 3: Red Hills, once you free the Slaver, Thorgestr; you follow those two downhill and learn more about the situation. After a short while, you will reach an area as shown in the image. Take the left route and go to the far end to find the 6th Lorestangir.
#7
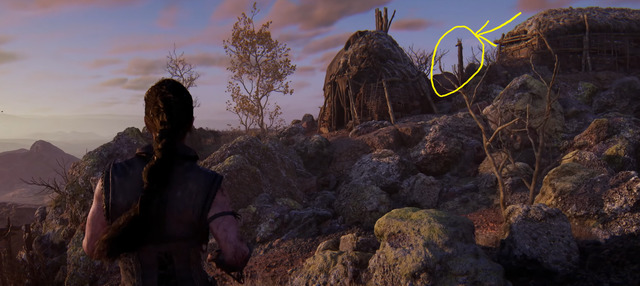
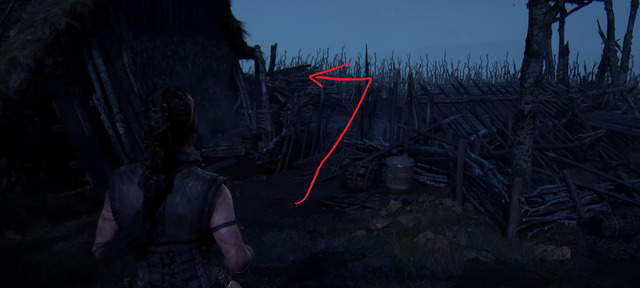
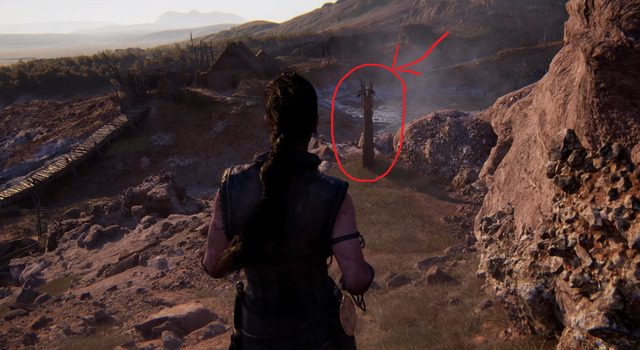
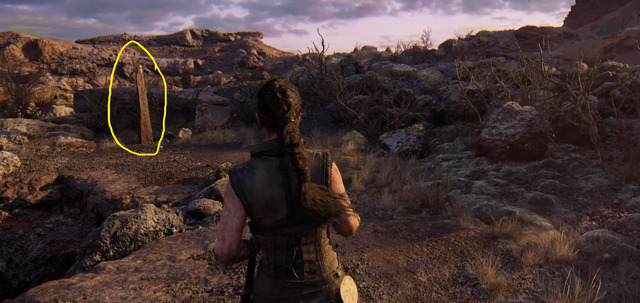
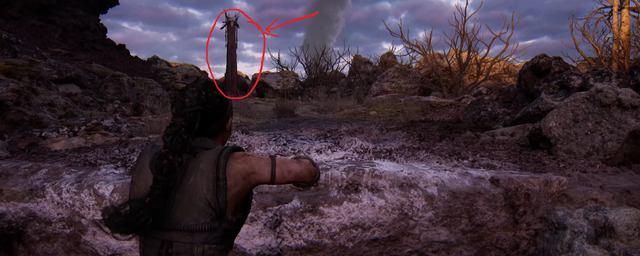
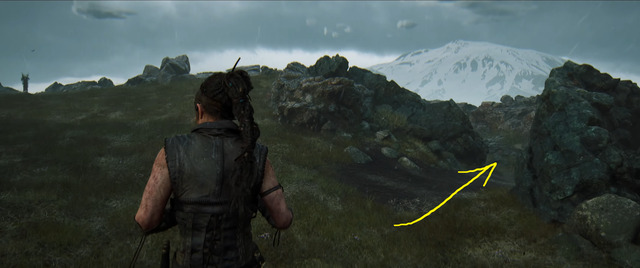
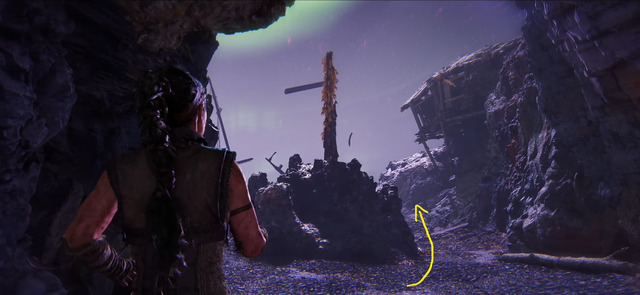
 In Chapter 3: On The Hill, after the cutscene; once you regain control of your character, you will need to take the right route instead of the left to go down as shown in the image. The route on the right will lead you to the 7th Lorestangir i.e. placed next to the hut.
#8
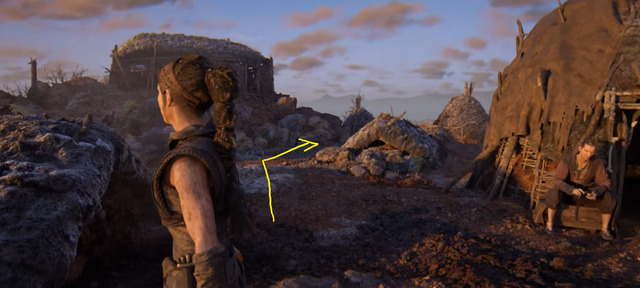
 In Chapter 3: On The Hill, once you solve the orb or stone puzzle to unlock the route, advance forward until you reach an area that has a path that will diverge on the right and left as shown in the image above. Take the route on the left to find the 8th Lorestangir.
#9
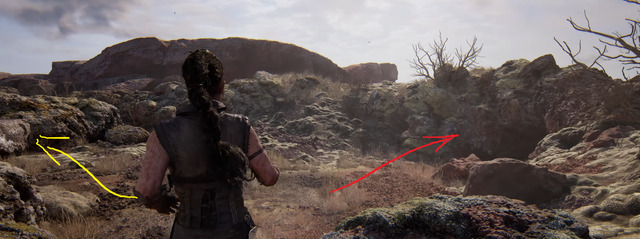
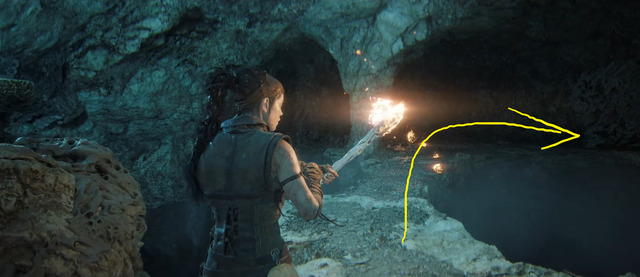
 In Chapter 3: On The Hill, you will come against another 3-orb puzzle. Solve to unlock the path forward. Advance until you reach the area where there are multiple water puddles or ponds. Referring to the image, you can take the left or yellow route next to the pond, you will find the 9th Lorestangir.
#10
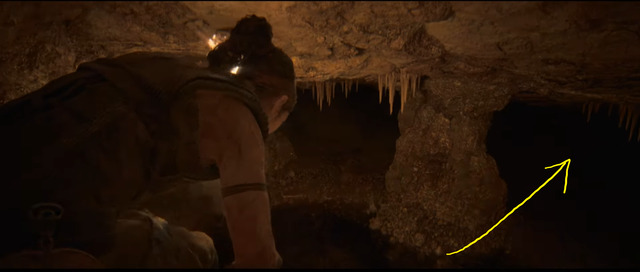
 Not far from where you have obtained the 9th Lorestangir in Chapter 3: On The Hill, take the red route forward and have a lookout on the right side as you climb uphill. You will find a small tunnel-like area where you can crouch through on the right side. Enter the tunnel-like area to reach the location where the 10th Lorestangir is placed.
#11
 In Chapter 3: Find The Hiddenfolk, once you reach the lake; you will find the stone pedestal where the orb is placed. Lifting it up will teleport you to another dimension where you are required to solve the puzzle. In that dimension, you will find the 11th Lorestangir placed on the wall upside down as shown in the image.
#12
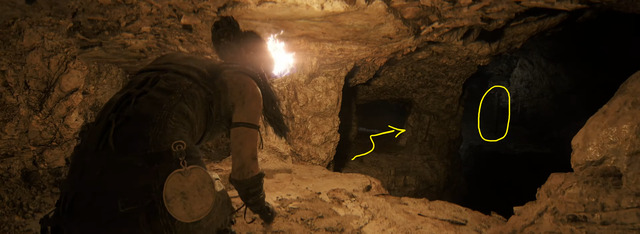
 In Chapter 4: Enter The Caves, while exploring you will reach a certain area as shown in the image. Drop down into the small puddle of water and take the right route. Climb the heighted platform where you will find the 12th Lorestangir.
#13
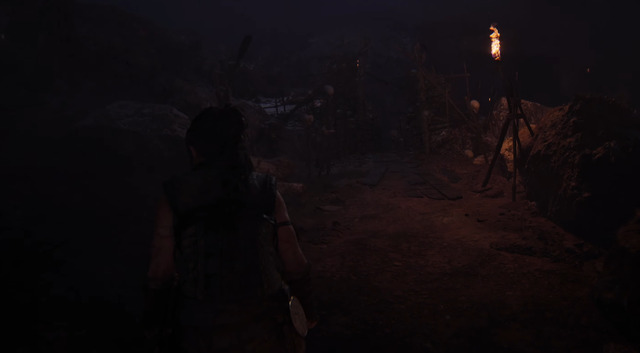
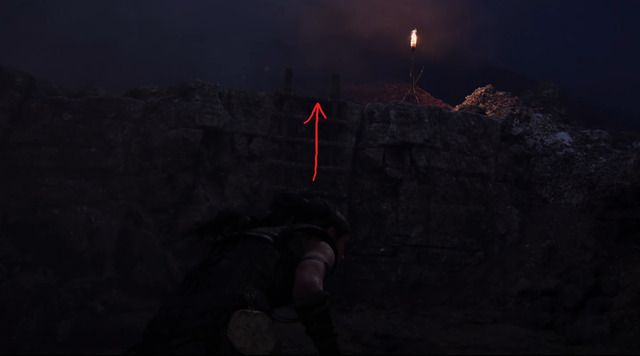
 In Chapter 4: Enter The Caves, after exploring for quite a while; you will jump into the hole that will let you cross the water. After that, you will have to ignite the blue flame to reveal the path ahead as shown in the first image.
Next, as you are moving forward, keep a lookout on the right side as it can be missed if you focus on the path. As shown in the second image, you will find the 13th Lorestangir in the Caves.
#14
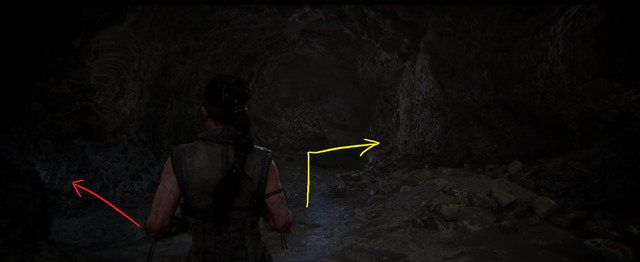 In Chapter 4: Act Of Sacrifice, after losing your sword; you must traverse the cave defenseless by following the sparkle of light. Once you leave the dark cave and the surroundings are lightened up, advance forward.
Once you reach an area where the stones are floating, advance forward and take the yellow route as shown in the image which will lead you to the 14th Lorestangir.
#15
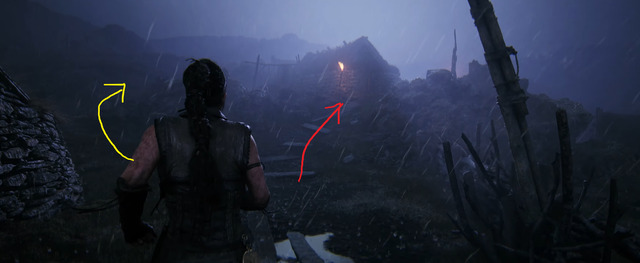
 After freeing Illtauga or Ingunn from Hel’s chains, and letting her reunite with her child will heal everything. Next, in Chapter 5: To The Sea, once you are alone and available to explore, reach this area as shown in the image. Take the path to the right as marked to reach and locate the 15th Lorestangir.
#16
 In Chapter 5: Sjavarrisi, once you start following Astridr; she will show you another Giant. After that you will climb the rock to reach an area as shown in the image. After vaulting the rock, look at the right side of the field to notice a Lorestangir far away. To find the 16th Lorestangir, follow the route as shown in the image and you will have 2 more to go.
#17
 In an attempt to solve the rune on the shore in Chapter 5: Another Question, you can enter the tunnel to move forward by altering the water ball. After exiting the tunnel, you will reach the location as shown in the image. Take the right route to locate the 17th Lorestangir.
#18
 Finally, the last Lorestangir can also be found in Chapter 5: Another Question. After learning about the Giant (Astridr’s father) who is haunting the sea, you will walk across the settlement. While advancing forward to meet Astridr, you will come across a path as shown in the image. The right path or the red path is the path that you need to advance for the story. However, the left path, or yellow path as shown in the image will lead you to the final Lorestangir.