The Ascent- Best Augmentations, Location & Attributes Tier List Explained
In The Ascent, there are multiple Augmentations and specifically, they can be improved further if the Attributes stats associated with is increased. The ability which you can equip and use it during combat is less due to the slots provided is low. So selecting the appropriate Augmentation is recommended if you want to survive. There is all the Augmentation compiled and Tierlist provided depending on its use and efficiency to increase your survival at The Ascent.
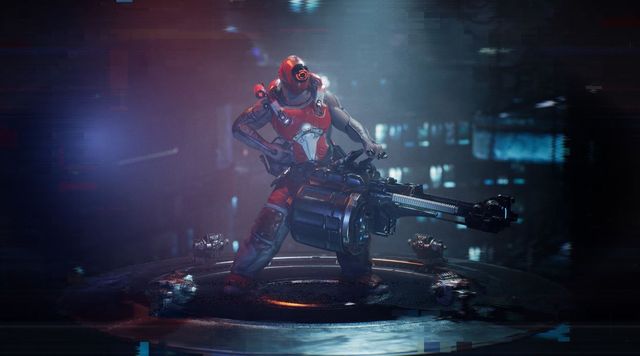
Best Augmentations, Location, And Attributes Tier list For The Ascent
- Biometric Attributes
It is an attribute in The Ascent that focuses on your body or other vitals. Increasing Biometric attributes determine the maximum capacity regarding health and energy. To increase Biometric attributes, you will have to increase the skills “Vital Signs”, and “Body Battery” which is dependent on it. It is also increased due to the conditions of a few Biometric-based Augmentation that improves the efficiency and working of it. There are few items that also increase the Biometric Attributes.
- Cybernetic Attributes
It is an attribute in The Ascent that emphasizes critical hit rate and tactical charge recovery. The more you spend XP on Cybernetics, the more chances of hitting critical on the enemies, and greater is the recovery for tactical recharge. To increase Biometric attributes, you will have to increase the skills “Critical Hit Rate”, and “Tactical Sense” which is dependent on it. It is also recommended to increase as to improve the efficiency and working of a few Cybernetic-based Augmentation. There are few items that also increase the Cybernetic Attributes.
- Frame Attributes
It is an attribute in The Ascent that emphasizes on reducing knockbacks, stuns, staggers, movement speed when equipped with heavy guns. The evasion is also based on this attribute which determines the evasion CD. To increase Frame attributes, you will have to increase the skills “Balance”, and “Evasion” which is dependent on it. It is also recommended to increase as to improve the efficiency and working of a few Frame-based Augmentation. There are few items that also increase the Frame Attributes.
- Motoric Attributes
It is an attribute in The Ascent that emphasizes on accuracy while decreasing the spread rate of bullets or reloads and weapon switch speed. Basically, the motor sensor of the body is enhanced which will allow you to switch and use weapons more efficiently. To increase Motoric attributes, you will have to increase the skills “Weapon Handling”, and “Aiming” which is dependent on it. It is also recommended to increase as to improve the efficiency and working of a few Motoric-based Augmentation. There are few items that also increase the Motoric Attributes.
Check out our previous guide on How to open Ice loot boxes?
Tier S
Joyrun Dragon: Initialize a dragon causing stasis to foes.
- CD- 18s
- Energy Consumption- 80
Summons a stasis dragon that affects multiple enemies depending on the level of your Cybernetics that are stunned and vulnerable. They take increased damage and once their health bar is depleted, the stasis bar needs to be filled up in order to deal explosion damage which is quite powerful to exterminate the mob or group of enemies. The CD is low, so it can be used multiple times when you have enough energy to use. It is found at the back of the building at Highstreet- Golden Satori.
Lockon Fire: Empties the remainder of your clip with perfect accuracy and extra efficiency.
- CD- 24s
- Energy Consumption- 40
It is one of the best Augmentation due to its maximum efficiency all the attacks or bullets fired will auto-aim target and deal damage with the highest accuracy. Simply equipping Minigun and activating the “Lockon Fire” will burn every enemy around the area. It can be purchased from the vendor “Grafter” quite early.
Overclock: Increases energy regeneration, tactical recharge, and reload speed.
- CD- 20s
- Energy Consumption- 60
Increase energy regen, tactical recharge, reload speed, damage reduction, and health regen everything provided during combat is just too overpowered. Bulldozing enemies each time as the CD is low and can be spammed multiple times that increases your survivability and kill potential at the highest tier. Complete side mission “One More Rep” to obtain the Augmentation at Cluster 13.
Stasis Stomp: Launches nearby enemies into the air and puts them into stasis.
- CD- 4s
- Energy Consumption- 85
Even though the energy consumption is high, you might find it useful due to its low CD and high damage potential. The Stasis debuffed enemies explode dealing damage to the area. It is quite useful to eliminate all the lighter enemies that swarm you as bigger targets are unaffected. Increasing the Frame attributes, increase the stasis duration. Complete side mission “Double Charge” to obtain the Augmentation at Cluster 13.
Tier A
Biometric Timestamp: Records your vitals for restoration after a short amount of time.
- CD- 18s
- Energy Consumption- 80
It is an emergency health kit that can be used to restore the recorded vital which is useful while kiting and hitting enemies. Due to low CD, it can be used 2-3 times per combat stage, which comes in the category for selecting Augmentation regarding survival. Complete side mission “Bubble Trouble” to obtain the Augmentation at Cluster 13.
Hyper Focus: Slows down an incoming projectile.
- CD- 35s
- Energy Consumption- 55
Deploys a dome-shaped barrier that completely slows down all the projectile that enters it. It is scaled and can be deployed on the battlefield for a duration that can be said about 35% of CD. It provides a higher reaction time to dodge the projectiles which are pretty useful while solo or party play and one of the best defensive Augmentation. It can be purchased from the vendor “Grafter” quite early.
Neutron Beam: A continuous energy beam that pierces armor and causes massive damage.
- CD- 15s
- Energy Consumption- 75
A focus high piercing beam can be fired at a single straight line to obliterate and melt enemies. The drawback of it is that you cannot move while using this Augmentation, however, you can change and rotate your aim. The duration of the beam can be increased if the Motoric attribute is increased. It can be purchased from the vendor “Grafter” at a later part in the game.
Propulsion Leap: This allows you to launch into the fray and cause a massive explosion where you land.
- CD- 8s
- Energy Consumption- 40
Depending on the Frame Attribute, the damage can be scaled high. Low CD and energy consumed spammable ability that deals AOE damage makes it pretty high up in the Tier. You can even jump and reposition yourself as well deal damage which is quite unique and a balanced Augmentation. Complete the side mission “The Dark Horse” to obtain the Augmentation at Cluster 13.
Spiderbots: Deploys multiple explosive spider bots which will seek out targets.
- CD- 30s
- Energy Consumption- 65
It deploys suicidal bots that deal explosion damage. The only drawback is that they spawn too close to each other and while during combat they perish instantly., however, they do complete their work for what they have been summoned for. Increasing the Cybernetics attribute will increase the number of spiders. It is awarded after the Main Story is completed after defeating the MegaArchanoid.
Volatile: Marks enemies within reach. Marked enemies explode on death.
- CD- 30s
- Energy Consumption- 80
AOE damage and the increase in your Cybernetic attribute will increase the explosion damage is where I am sold. However, the CD and Energy Consumption makes it less spammable and for that, it is placed in this tier.
Tier B
Homing Mim: Locks on to nearby enemies and fires homing missiles. Barrage size is determined by other subsystems.
- CD- 10s
- Energy Consumption- 75
Slow down in order to activate the Augmentation that deals an AOE damage. After locking down enemies in the area, a barrage of missiles is fired that deal heavy damage which completely annihilates everything around. Increase the Motorics attribute to increase the number of missiles. It can be found later from the vendor “Grafter”.
Hydraulic Slam: A punch delivered with massive hydraulic force propels enemies away from you.
- CD- 3s
- Energy Consumption- 60
A knockback hydraulic force that is quite useful to create space when you are swarmed from all sides. The low CD makes the Augmentation much better due to its availability and efficiency. Even paired up with a melee or low-range weapon can make it really shine. It is awarded from the very beginning of the game.
Tentakill: Extends multiple robotic tentacles into the ground which will search out enemy targets and cause damage.
- CD- 20s
- Energy Consumption- 100
Summons multiple tentacles from the ground to deal damage to multiple enemies and mobs. It is useful due to its nature to create space and deal AOE damage. Complete side mission “Plug And Play” to obtain the Augmentation at Stimtown.
Tier C
Mono Defender: Deploys a tough monobot focused on close combat.
- CD- 60s
- Energy Consumption- 60
Summons a mechanical defender bot for a short duration, however among all the Monobots it excels in damage, attracting, and displacing enemies. The knockback is useful in order to create space. These monobots cannot rise up from this Tier as even depending on your build, you will find other Augmentation useful as they deal damage and clear waves more easily. It can be purchased from the vendor “Grafter”.
Rat Bite: Hack enemies to fight for you for a short duration of time.
- CD- 180s
- Energy Consumption- 150s
It might sound useful and it is for some extent as the hacked enemies will attack their own species or force, however, once the effects end there hostility towards you will be regained. If the CD would have been less then it could have been ranked at upper Tier but overall it is not useful to bring and consume your slot. It can be obtained at the “Deep Stink-Waste Disposal” location behind the Ice 2 Door.
Razor Dronettes: Initiate a swarm of drones that deal damage to enemies in range.
- CD- 15s
- Energy Consumption- 60
Spins a cutting shield around you that deals damage to close proximity. It is useful in the build where you have high endurance and melee combat style. Due to low CD and energy consumption, it is useful but useless at the same time if you are doing a range build. Complete the Side Mission “Prison Break” to obtain the Augmentation.
Tier D
Energy Mesh Shield: A protective energy mesh shielding you from incoming fire.
- CD- 15s
- Energy Consumption- 40
Deploys a protective energy shield in front of where you are looking at 180 degrees. It blocks the incoming projectile damage for a specific amount of damage. The damage it blocks can be increased if you have a higher level of Frame Attributes. It can be found in the Chunk’s Basement “Dungeon”.
I/O Converter: Weapons, projectiles, and explosions now deal digital damage only.
- CD- 10s
- Energy Consumption- 30
Useful against mechs and robotic enemies, deal additional damage to it whereas it is useless against enemies that have flesh. It can be purchased from the vendor “Grafter”.
Looten: Deploy a companion drone to help collect loot from the ground.
- CD- 24s
- Energy Consumption- 25
For a larger duration, it can be deployed to collect all the loots which is useful. However, an Augmentation that does not affect combat or survivability is somehow questionable. So for me, it can be placed in this tier. It can be purchased from the vendor “Grafter”.
Mono Ranger: Deploys a nanobot armed with a rifle.
- CD- 60s
- Energy Consumption- 90
Summon a mechanical bot that shoots enemies which lacks damage and distracts some of the enemies for a small duration. If Augmentation is used, the duration at which they last is too less and the effect on the battlefield is very low. It can be purchased from the vendor “Grafter”.
Life Transfer: Marks enemies within reach. Marked enemies taking damage will heal you.
- CD- 70s
- Energy Consumption- 75
It is an AOE augmentation that marks the surrounding enemies. The marked enemies when taken damage will let your character heal for a small portion of health. It is useful against multiple enemies where its effect can be seen and implemented. It can be replaced with other Augments which allows you to heal. If it would have introduced that the damage taken by marked enemies is increased or even the CD has been reduced then it would have been B Tier at least. Now, there is no potential for this Augmentation so it is placed in this current tier. It is found inside a Red Chest placed in “Corpzone- Oeragata Bath House”.
Mono Scrapper: Deploys a light monobot focused on close combat.
- CD- 45s
- Energy Consumption- 80
Summon a mechanical bot that slashes enemies with melee weapons for a small duration. The Augmentation which summons nimble monobot might be somewhat useful if the survivability of the Scrapper was increased other than that it is completely useless as other Augmentation can be used to deal massive damage and chaos. It can be purchased from the vendor “Grafter”. It would have risen to C Tier but going beyond that is not in its capability at The Ascent.
For more guides on The Ascent, click on the link that has been mentioned below the description: