Last Of Us 2- Safe Combination Of All The Locations
Last Of Us 2 is an action-adventure survival horror game where you will find several puzzles as it is not surprising if you have played and completed its predecessor. During your journey and adventure, you will come across numerous safe that requires a specific combination to unlock and open it. In this guide, we have mentioned all 14 safes that you will find or need to find to collect the content present and complete an achievement or Trophy i.e. associated with it.
Safe Combination Of All The Locations In Last Of Us 2
During the first patrol mission of the game in Jackson, once you put on the mask and enter the infected supermarket following the story, you will come across a door after you squeeze between the cracked wall. After opening the door it is quite simple, as safe will be located at your POV and the note present on the table will lead you to the code.
- Safe #2 ( 60-23-06 )
On Day 1 in Seatle, Downtown area, you will find an actual vault in a bank near the safety deposit boxes which you will need to open it using the mentioned code. Well, the vault code will be found inside a bag which also mentions the time and route of the guard which was supposed to be used during a heist. Speaking of safety deposit, try to open one of the corners deposit boxes to collect an artifact and unlock a trophy.
- Safe #3 ( 04-51 )
On Day 1 in Seatle, the Downtown area between 4th and 5th Avenue of Spring Street and Madison Street will be the next safe location near the Gate West 2. After interacting with the safe, use the Gate West 2 code to unlock the safe.
- Safe #4 ( 86-07-22 )
On Day 1 in Seatle, the Downtown area between 5th and 6th Avenue of Spring Street will be a Seattle Courthouse. The Building Directory board that will be placed on the wall in the Courthouse will be the location where you safe is located. Besides the Directory Board, break the glass and enter the room where you will find a safe and its code mentioned in a whiteboard.
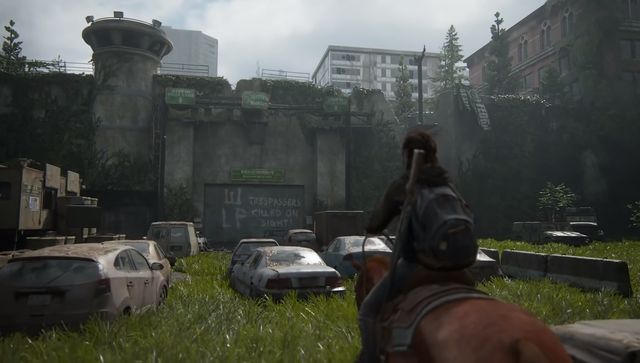
- Safe #5 ( 55-01-33 )
On Day 1 in Seatle, there is another safe located but in the Capitol Hill area. As soon as you reach the location where cars and tripwires are placed to avoid any incoming infected, you are near to the location of safe. After breaking the glass, you enter a store that looks like a training ground, and inside you will find a Trading Card “Bizarrebra”. The safe will be found in that vicinity whereas the codes are divided into two locations. On a notice board which you will find inside a shop beside a yellow abandoned car and on a toilet will be Staci’s last 2 digits.
- Safe #6 ( 30-82-65 )
On Day 2 in Seatle, you will find a safe located in the Hillcrest area behind a door blocked by a dumpster. You will need to move the dumpster of the Tattoo parlor and open the door where a bunch of infected will be waiting for you. The code will found placed in the bar or a restaurant’s kitchen wall.
- Safe #7 ( 10-08-83 )
On Day 2 in Seatle, you will find a safe located in the Seraphites chapter. Once you leave the theatre and pushed your way and made it your way across Route 5 hospital part, you will need to reach the 2nd Floor by climbing up one of the trucks near to the platform. The safe will be located in one of the rooms and the letter mentioning the code’s clue which would be on the table around in the drawing-room.
- Safe #8 ( 38-55-23 )
On Day 2 in Seatle, you will find another safe located in the Seraphites chapter. After encountering the Seraphites, you will climb down to the ground where eventually you will able to locate Weston’s Pharmacy shop. On the counter, from inside you will find the code whereas the safe is also located very close to it. You will need to crawl down the hole in a wall to locate the safe.
- Safe #9 ( 70-12-64 )
On Day 3 in Seatle, you will find another safe and code located in the Flooded City. After stealing the speedboat, you will eventually need to leave the boat to open the gate to continue. Climb up to the staircase, where you will find a dead guy beside a note. The note contains the code and on the right side of the door where you just entered after climbing the stairs will be a trolley that can be moved to crawl under and reach the safe.
- Safe #10 ( 17-38-07 )
On Day1 in Seatle, while playing Abby, you will find the safe and code On Safe Foot area. Once you are out of the building with Mel, you will come across a trailer that has its window blocked from one side. You will need to move across another side of the trailer where you can break the window and enter the trailer. In this trailer, where you found Indiana Coin will be the exact location where the code is marked on the board. Opposite to the barred window of the trailer, will be a building that has a crack on its wall, squeeze past from it to unlock the safe.
- Safe #11 ( 689689 )
Continue the journey until you reach the Wall Painting which Abby will mock in the Hostile Territory. After vaulting the wall to reach the street full of shops, make sure to keep your eye on the left side of the shops. The shop named “Jasmine Bakery” is the cue, break down the glass of the shop and enter to locate the safe. The code will be found if you enter another building “Red Dragon Bar” opposite to the Jasmine Bakery and make your way to the 2nd floor to jump across where the note will be placed.
- Safe #12 ( 907701 )
On the Coast, you will enter the boat where the code will be placed in the same room where you find the crossbow. After collecting the code at the end of the room, move top to the control room or captain’s station where the safe will be located.
- Safe #13 ( 302304 )
Once you reach the Shortcut area, you will find a nice view of the waterfall. On the left side of the ledge, you can enter the room by sliding the door where you will find the riddled note or clue. The safe will be located in the bedroom.
- Safe #14 ( 121879 )
The final safe is located in Descent where you will find yourself in the gym section. In the gym, there would be a staircase that leads you to the 21st Floor or roof access. Besides the emergency exit, you will find a door in front of a reception desk where the safe is located. The clue will be found in the Orchard’s Juice Bar that will notify the code which is the same as the Wi-Fi password mentioned in front of the gym room.